The Wonders of Digital Photos !
November 29, 2014
Today's cameras can take photos that result in huge file sizes. Unfortunately these large photo files are very difficult to share and when included in presentations, can make the presentation very large. Often times creators of presentations, documents, and online sites will just insert the large photo file in and then reduce the shape of the photo to fit the space available. This approach, while it does provide the desired end result of the photo being viewable, it also causes the size of the resulting document or online page to be very large and cumbersome for users to consume.
Typical photo file size right from the camera can be 4 "mega bytes" (or MB in computer speak)... or more ! Pixel counts will usually be 4000 x 3000 or higher
Photo Bytes vs. Pixels
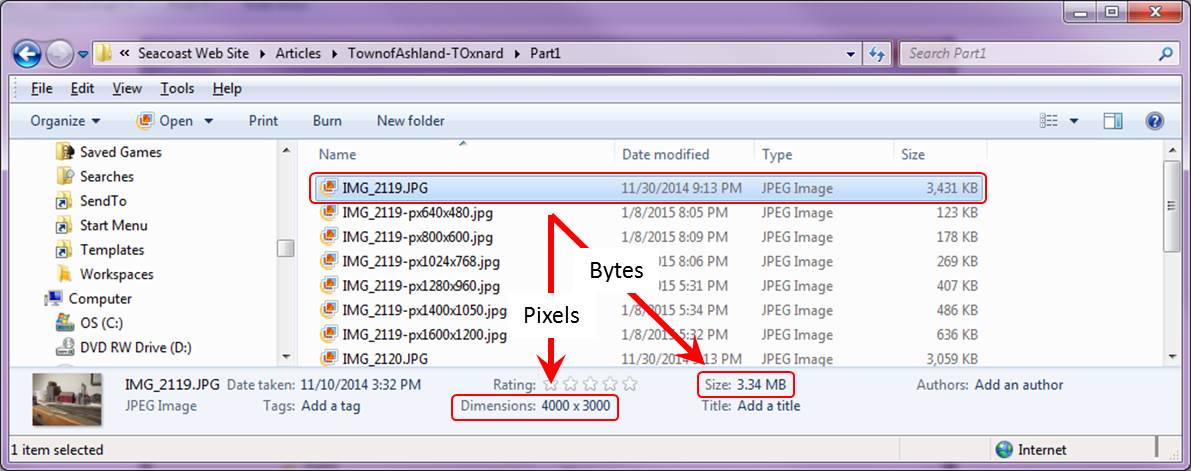
Bytes are a measure of the computer file size of a photo. In the example below, looking in Windows File Explorer, you see the file size of a photo as 3,431 "kilo bytes" (of KB). This translates to the file size being roughly 3.4MB (1,000 KB = 1 MB, therefore 3,400 KB = 3.4 MB)
Pixels are a measure of the density of color dots that make up a digital photo. A photo that is 4000 x 3000 pixels will give a very high quality 8†x 10†print…and it will also make a very nice 18" x 24" poster !
There is a better way...
The high level of pixel density of digital photos is not necessary for presentations or online viewing. One option to reduce the pixel density is to lower the photo quality settings in the camera. This is troublesome as you would be constantly adjusting the camera settings depending on your photographic needs. In general, you should always take the original photo at the highest resolution possible, taking into account available memory on the camera, etc.
The other option is to reduce the size of the photo. Photos can be reduced by 80 - 90% in pixel density size and still not lose 'viewability' in presentations and online. Using simple tools (such as Windows Paint or equivalent types of tools), photo files can easily be reduced.Once the reduced photo is placed into a presentation or online, it can then be stretched as needed.
So how do you reduce photos ?
Using Windows Explorer:
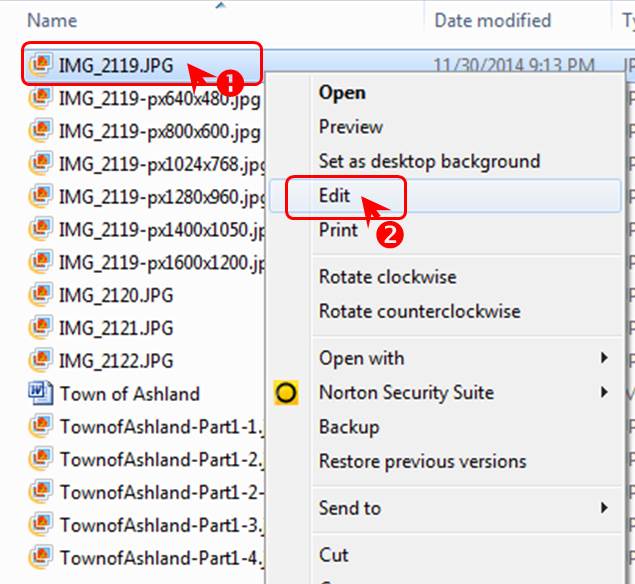
- Select the photo file to be reduced.Use the right mouse button to get the file options menu to pop up
- Click "Edit"
These actions will cause the Windows Paint program to open up with the photo visible.
In Windows Paint:
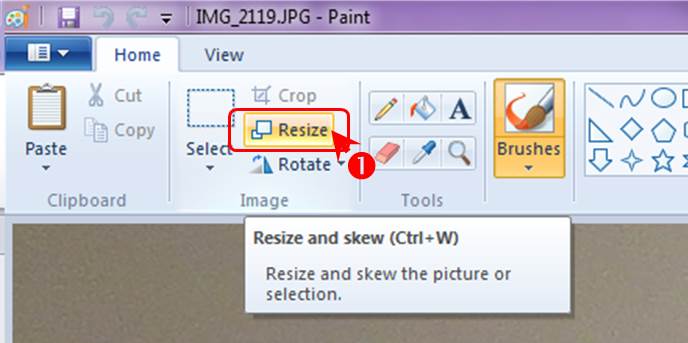
- Click the "Resize" menu item. The "Resize and Skew" menu will pop up
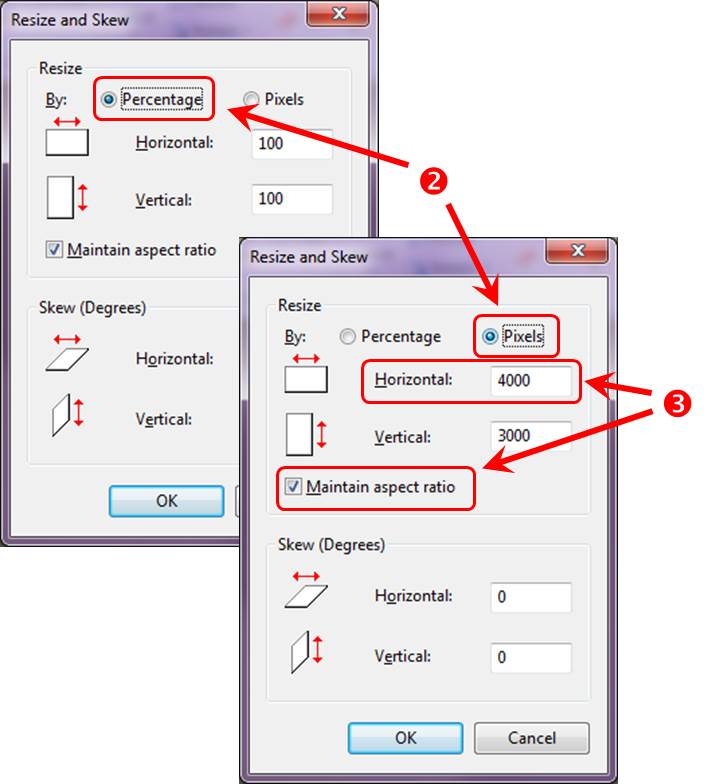
- In the Resize and Skew menu, photos can be reduced by a percentage or by the pixels. Using pixels count to resize provides a more accurate reduction.
- Edit the value in the "Horizontal" field as desired. Ensure the Maintain aspect ratio" box is checked regardless of the method used to reduce. The Vertical setting will adjust accordingly based on the original photo aspect ratio.
It is recommended that the horizontal size be set to 640 pixels. This gives a good quality photo to work with while keeping the file size down.
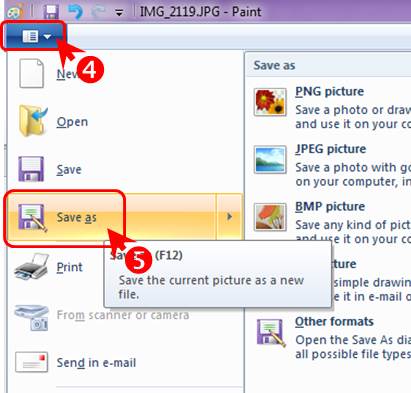
- Save the newly resized photo file by selecting the "File" icon in the upper right corner of Windows Paint
- Click on the "Save as" menu item.A "Save As" window will pop up
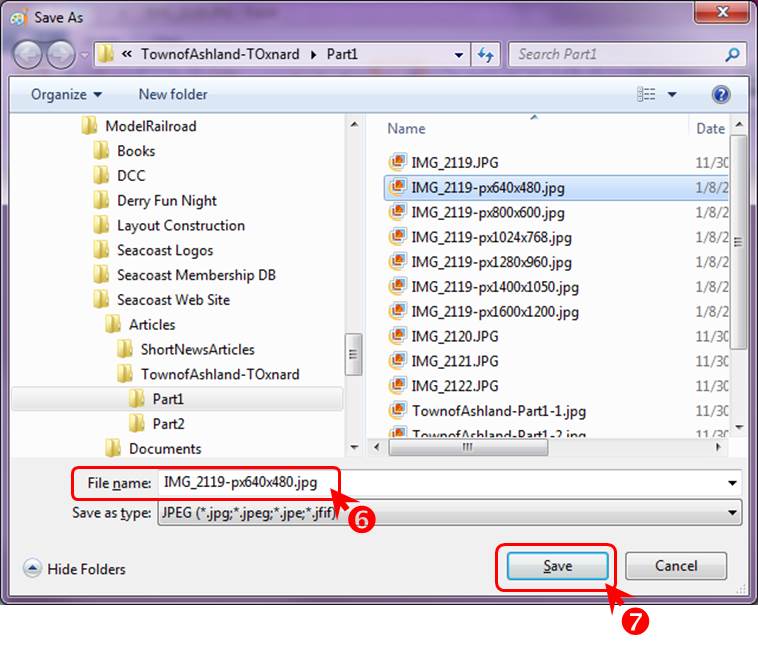
- In the "Save As" window, enter the file name you wish to use to describe the file in the "File name" field
- Click the [Save] button
Tip: Use the same file name as the original file and append the pixel size to the end of it (e.g. IMG_2119-px640x480.jpg).
The resulting file from performing this reduction is one that is only 123KB and with dimensions of 640 x 480 pixels.A whopping 96% reduction in file size !!!
That is all there is to it !!Now you can insert photos into documents, presentations, and use them online without killing a forest of little electrons !